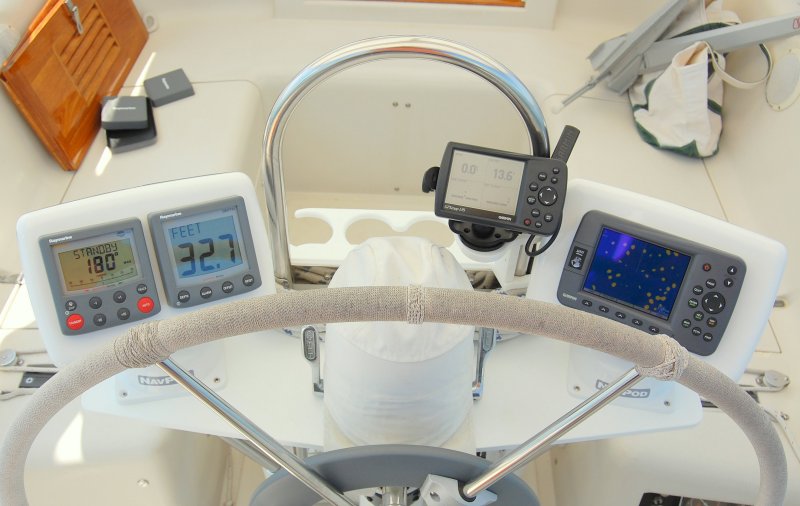
It occurred to me, after seeing a guy at the boat yard destroy a $200.00 + NavPod, that some may benefit from my gained knowledge of how to handle drilling and mounting instruments to them.
Rule #1 - If they offer a pre-cut NavPod for your instrument BUY IT!!!!! DO NOT cheap out on this and try to cut it your self if it can be avoided!!
NavPods are made of a plastic and plastic is inherently finicky to drill and cut into especially when tolerances for instrument bezels need to be very precise. Here are some tips that will help..
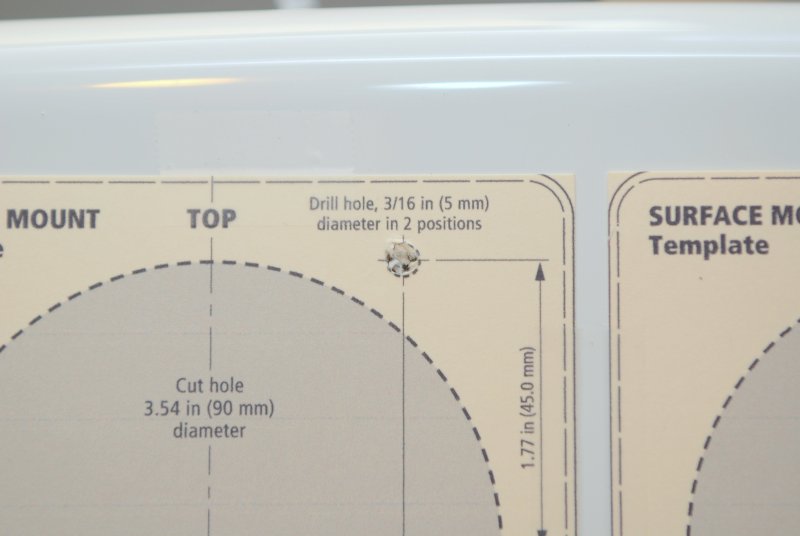
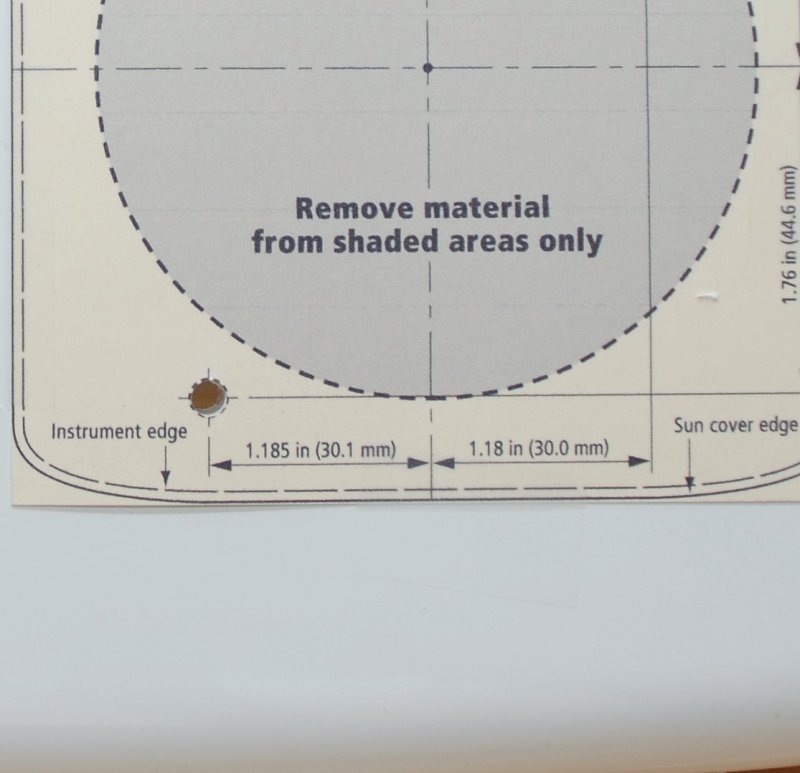
#1 Print your template from the companies web site being sure to have your printer NOT using the "scale to fit paper setting"! If your template is too big bring it to Staples or Kinko's and have it photo copied onto heavy weight card stock. Always be sure measure the hole centers after you print out a template to double check the proper scaling and to ensure the proper template size.
#2 Use a heavy weight card stock for the template! I can not stress this enough it is very important that you use a heavy weight paper as it will not get twisted up in the drill, hole saw or jig saw.
Heavy Weight Card Stock Templates:
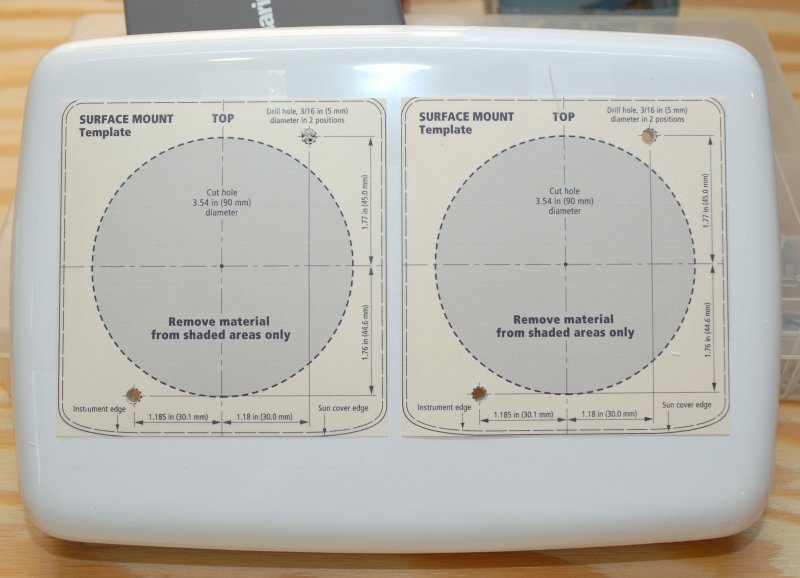
#3 Center, align and securely tape your template, after trimming to size, to the face of the NavPod.
#4 Use only BRAD POINT DRILLS!!! If you don't have them buy them! Many instruments such as some of the Garmin plotters require VERY, VERY precise holes. A drill that wanders even a 1/32nd or 1/64th of an inch can make a real mess and potentially ruin a $300.00 pod.
Brad Point Drill:

#5 Start the drill and the hole saw in REVERSE then switch to forward once through the surface skin and template.
Brad Point Drill Started in Forward:
Brad Point Drill Started in REVERSE (note the clean hole):
#6 When using a hole saw pre-drill the arbor hole using a 1/4" brad point drill first. This will ensure your hole is perfectly centered over the X on the template and that the instrument hole will line up with the mounting screw holes.Most all hole saw arbors use a 1/4" bit whether it's a Starrett or a Lennox but do confirm your hole saws arbor bit size first.
#7 When using a hole saw, like when mounting Raymarine ST-60 series instruments, start in reverse then switch to forward. This will give a nice clean entry with no chipping of the plastic.
#8 Use the absolute SLOWEST speed your tools will go and if the plastic begins to melt stop, let it cool and then start again. I used my air compressor to blow the chips away as I cut and to keep it cool. It took about 5 minutes to rig the set up so that it would automatically blow where I was cutting. If you have an air compressor this may be worth while. A simple 4" hole may take as long as 15 minutes to cut while trying to prevent melting of the plastic. Patience is a virtue!!
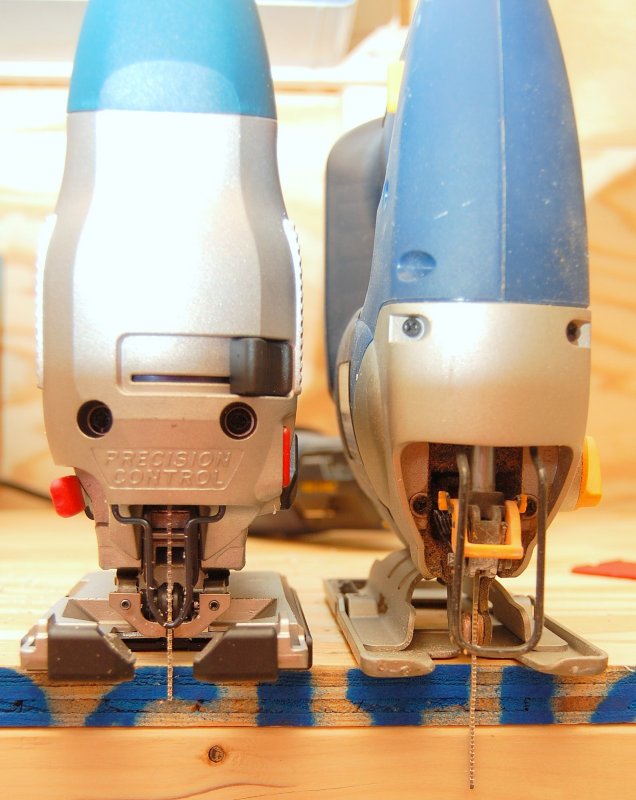
#9 When using a jig saw tape the entire face of the NavPod with blue tape to prevent marring of the surface. Also use a HIGH quality jig saw such as a Bosch. While I'm as big a fan of cheap tools as anyone this is NO PLACE for a cheap jig saw. I would NEVER even consider using my Ryobi (pictured on right) to perform this task as it is FAR from accurate!!
Bosch on Left Cheap Ryobi on Right:
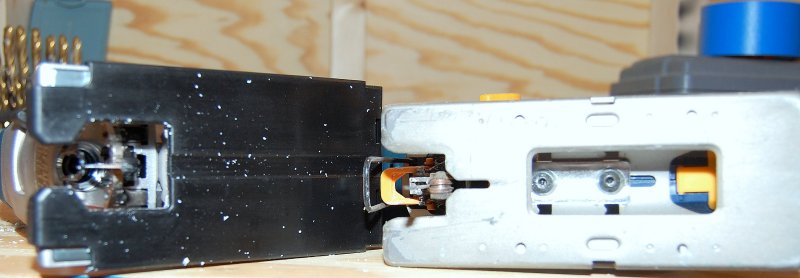
Bosch non-mar plastic base on left Ryobi metal base on right:
#10 Use the right blades for your jig saw! I use these and they make beautiful clean cuts and don't even rip the paper template. If they can cut paper clean....

By using the right tool for the right job your finished result will work and perform as intended.. Both of these pods required custom cutting and mounting..