Well I started my rib/stringer replacement today.
I am starting with two stringers in the aft portion of the cockpit. I used a blade on a grinder to cut through the fiberglass tabbing over the old stringers. The #10 stringer (all the way aft) was rotted through and through.
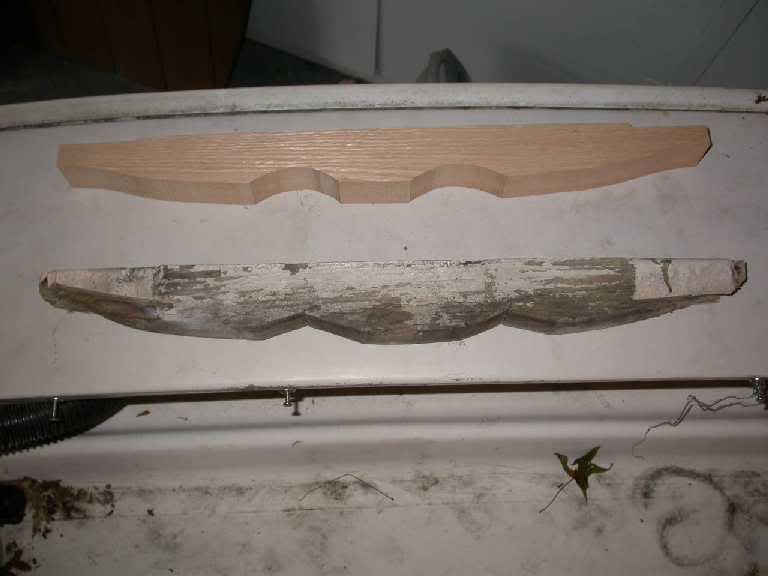
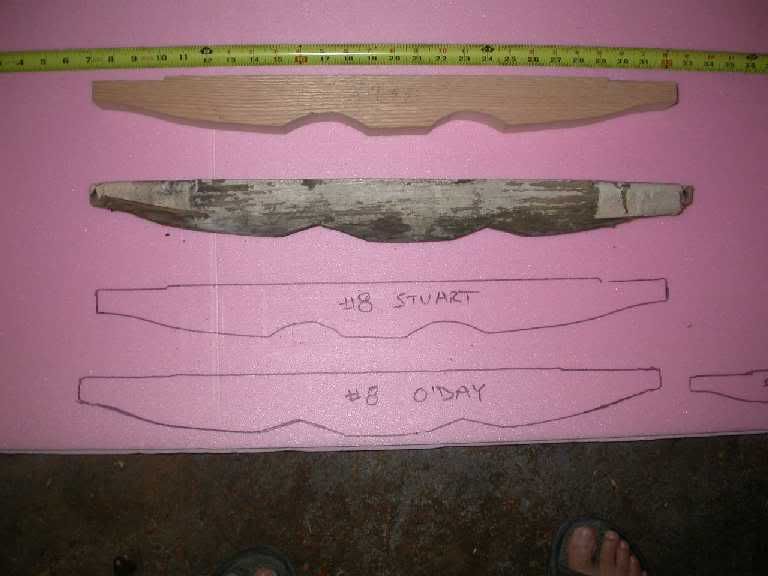
The #8 stringer came out relatively intact, allowing me to trace it's shape.
I purchased a "rib kit" from Stuart Marine, the current manufacturer of Rhodes 19s. They are made of White Oak, like the originals. The Stuart stringers have a half moon shaped cut out, one each side of the bottom of the stringer. The original O'Day stringers appear to have a wide V shaped cut out in the bottom of the rib which fit over an inverted V (^) of fiberglass in the bottom of the floor.
It appears to me that the cutout is meant to "hold onto" the inverted V in the cockpit floor. Does this sound right? Shall I fill the area of the half moon with epoxy thickened with chopped glass? or just West System 405 filler?
I took some pictures and hope I can post the links properly. Please let me know your thoughts.

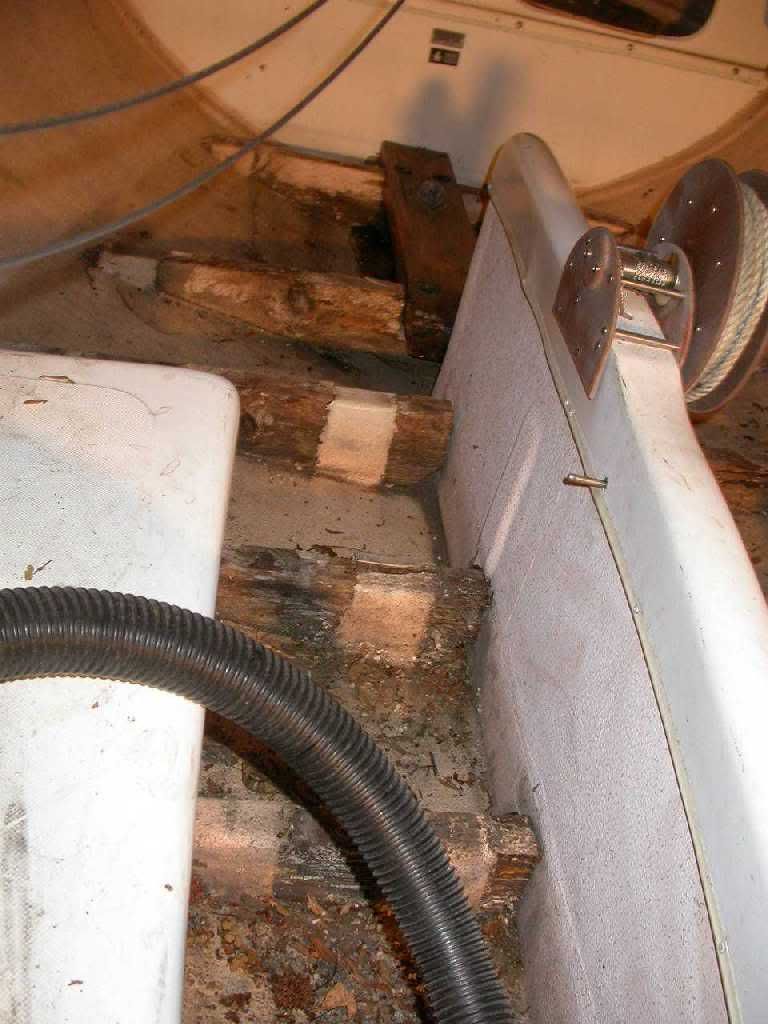
Above is a picture of the stringers along the centerboard and forward to the mast step.
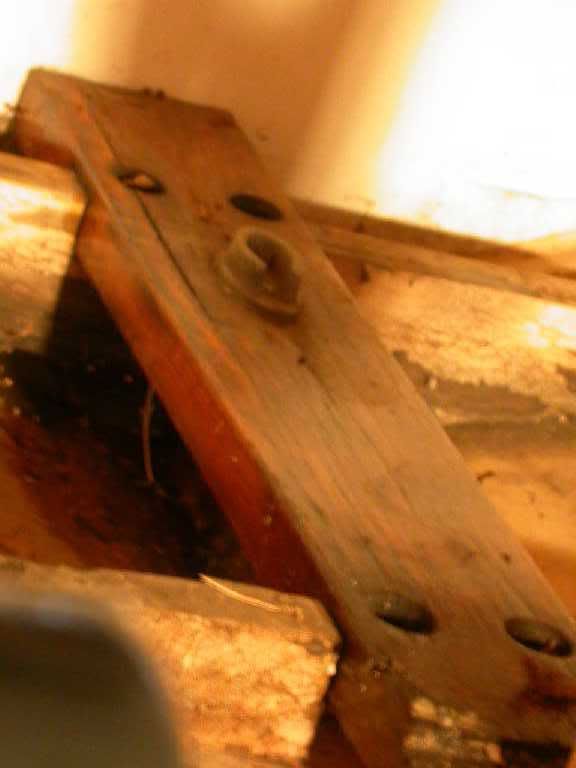
Below is the mast step

Here is Stringer #10:

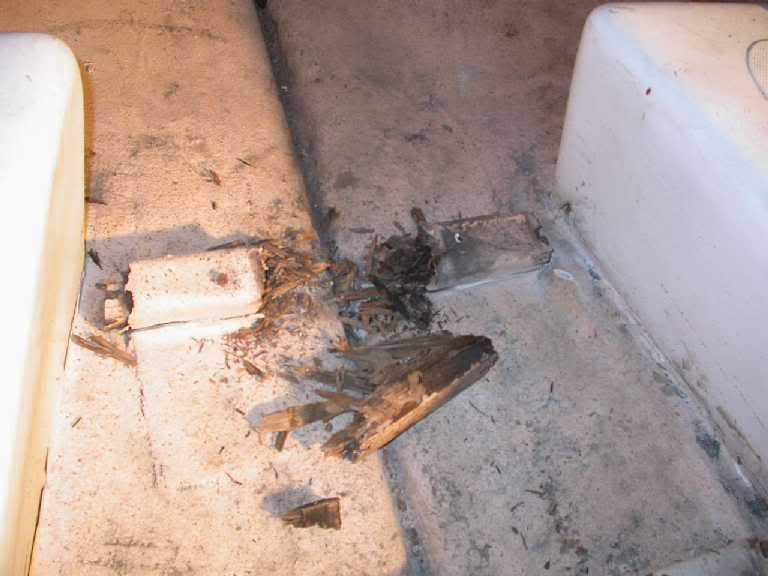
Stringer #10 removed:

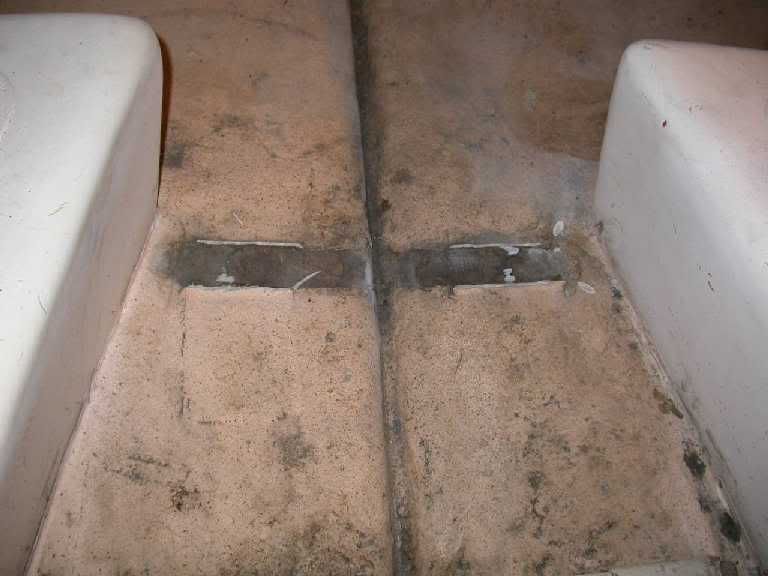
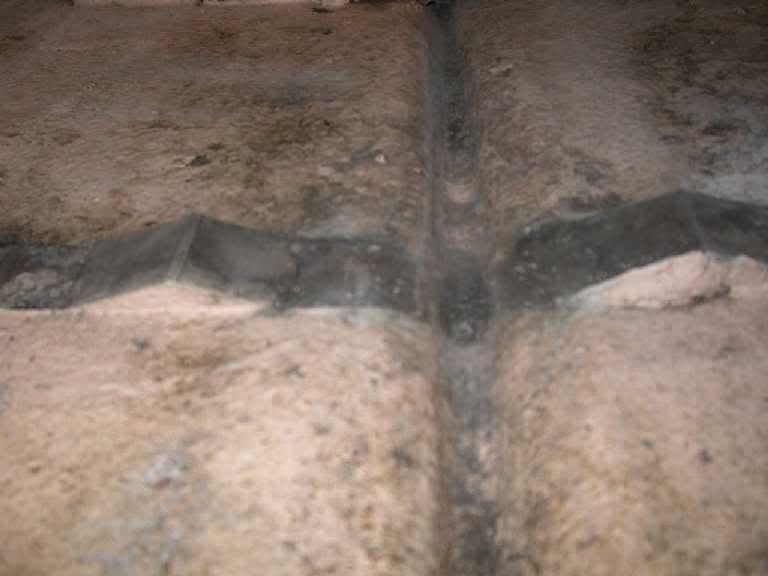
Stringer #8 removed and the inverted Vs:

Old O'Day #8 Stringer and the New Stuart #8 Stringer:


I cannot seem to get the Thumbnails to show up on the message.