Bottom Fairing Question (pics)

Ask a question...get an answer (or two).
Post Reply
The Froon
Almost a Finish Carpenter
Posts: 99
Joined: Tue Sep 23, 2008 11:18 pm
Boat Name: TBD
Boat Type: Westsail 32
Location: Jacksonville, FL
Contact:

Bottom Fairing Question (pics)

Post by The Froon »

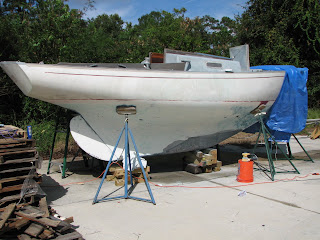
I have the bottom sanding almost completed (except for where the jack stands are positioned) using my 5” VS random orbital sander to remove a lot of the swirl marks left by my 6” power sander, and will begin fairing very soon.  I know this has been covered probably numerous times, but now that I am about to begin this work myself, I wanted to throw out my specific issues for feedback.
Here are a couple pictures showing very small gelcoat blisters (?).  For the most part, they are perfectly round little holes – about as deep as the gelcoat.  The boat has been out of the water for over a year, and so about as dry as things are going to get. 
  My question: should I (1) grind around these areas to remove the cracking and pitting areas, (2) wipe down with acetone, (3) brush on a layer of neat epoxy with a high-density foam roller, (4) apply thickened epoxy (West System 407) for filling and sanding (repeat if necessary), (5) apply a couple more coats of neat epoxy for West System 422 additive for a barrier coating, then (6) apply bottom paint?
  Do I need to grind off large amounts of material, or can I just make several passes ensuring all loose materials has been removed? Also, for fairing out the keel, do I need to go with a high-density filler…or can I get away with 407?  I am thinking that I will apply a coat of neat epoxy, then fill and fair, then apply a couple coats of neat epoxy plus 422 additive prior to bottom painting – just like the majority of the bottom work proposed above.

Image
Image
Image 


(not sure if the image paste worked, but pics are on my blog)
Thanks Plastic Classic Forum,
 
Brian
Last edited by The Froon on Mon Oct 20, 2008 9:51 pm, edited 1 time in total.
User avatar
Rachel
Master of the Arcane
Posts: 3044
Joined: Tue Dec 07, 2004 7:59 pm

Post by Rachel »

Brian,

Just for your information, you can click on "preview" (to the left of "submit) before you post and it will show you exactly how your post will look. So you'll know if the photos are going to show up properly.

In this case, I think the problem is that your images are .bmp file type, and to be posted here they have to be either .jpeg or .gif. Here's more info on that:

http://plasticclassicforum.com/viewtopic.php?t=552

Rachel
The Froon
Almost a Finish Carpenter
Posts: 99
Joined: Tue Sep 23, 2008 11:18 pm
Boat Name: TBD
Boat Type: Westsail 32
Location: Jacksonville, FL
Contact:

Post by The Froon »

Thanks Rachel...I have corrected my posts...any feedback?

Thanks,

Brian
User avatar
Tim
Shipwright Extraordinaire
Posts: 5708
Joined: Tue Apr 01, 2003 6:39 pm
Boat Name: Glissando
Boat Type: Pearson Triton
Location: Whitefield, ME
Contact:

Post by Tim »

The Froon wrote: Also, for fairing out the keel, do I need to go with a high-density filler…or can I get away with 407?
The phrase "get away with" implies that you think 407 low density filler, aka phenolic microballoons, is somehow a less than suitable choice. This is not the case.

Microballoons are a fairing filler. They are for fairing, both above and below the waterline. They combine the strength needed in a typical fairing situation with relatively light weight and the workability/sandability characteristics needed by the user.

The term "low density" seems to lead many people to believe that somehow they are less suitable than the "high density" filler that is also available, but that's just not true. "Low density" doesn't mean cheap or weak. It's low density because the material in the filler--hollow spheres of phenolic (plastic) material, or "balloons"--is lightweight and hollow; hence low density. It's probably a poor choice of nomenclature by the West System guys.

West System high density filler is not a fairing filler: it's an adhesive filler designed for other purposes, namely hardware bonding.
The Froon wrote:...any feedback?
The "blisters" you show in your photos are the typical gelcoat divots that occur at and just above the waterline, usually when the boottop is located too close to the water and therefore remains fully or partially submerged. Water gets behind the non-submersible paint used here and festers, eventually causing these cosmetic blemishes in the gelcoat. They are extremely common in these old boats. The growth that tends to form in these areas, when the boot is too low, only exacerbates the moisture retention problem. Also, significant growths can actually adhere to and, when removed, pull away sections of gelcoat like this. Proper boottops and clean waterlines aren't only a cosmetic thing.

How far you take the repair preparations will depend largely upon how far you're taking the paint preparation. You can sand and fill these areas as you suggest, and it will be fine. Depending on the character of the blemishes, certain aspects of the filler may remain visible beneath the highest gloss paints. Therefore, it may be beneficial to grind down the surface further in the worst areas, so that your filler covers a larger area with better bonding surface.

I can't make this judgement based on what I can see and what I can know about your situation, but the real point is that you don't have any sort of significant problem going on here, so treat it as the cosmetic issue that it is.
The Froon
OK, I have to ask what your user name means. You don't have to share, but I bet I'm not the only curious one.
---------------------------------------------------
Forum Founder--No Longer Participating
Quetzalsailor
Master of the Arcane
Posts: 1100
Joined: Fri Aug 26, 2005 9:53 am
Boat Name: Quetzal
Boat Type: LeComte North East 38
Location: Philadelphia, PA

Post by Quetzalsailor »

I think I'd sand all that checked gelcoat off, that I see in your pic; I think the checking will simply continue. I'd coat out the affected area in neat epoxy and, in the same (or subsequent, if necessary) operation, add fairing filler to the batch and apply it.

You do have to plan ahead when choosing fillers, putties, primers, etc. Some things go on over others but not vice versa. I remove all earlier repairs if I do not know what they are or how well they were done.

Both West Systems' fairing fillers work well and experience will show you how much filler you can get into the neat epoxy. More filler = easier sanding and feathering; too much and you can't work it; too little and it runs. Even though the fillers are basically just an expensive way to buy air, using more than less is cheaper and easier.
The Froon
Almost a Finish Carpenter
Posts: 99
Joined: Tue Sep 23, 2008 11:18 pm
Boat Name: TBD
Boat Type: Westsail 32
Location: Jacksonville, FL
Contact:

Post by The Froon »

Tim wrote:
The Froon
OK, I have to ask what your user name means. You don't have to share, but I bet I'm not the only curious one.
Thanks for the tips Tim; My wife and I nicknamed our daughter Froonie when she was just an infant, and the name stuck around. This Sea Sprite I am restoring will be named Froonie, and will be her boat upon completion.

Tim (the forum): I have a lot of crazing over the hull (above the water line), so can I sand this down, apply an epoxy barrier, and then paint. Or do I need to take greater measures? I have read on your Triton381 site that darker color paints will show all defects...will the crazing show through. What would be your recommendation?

Also, I have applied teak oil to properly prepared companion hatch boards, but now am thinking of going back with a varnish. Do I need to re-sand?

Thanks,

Brian
bcooke
Master of the Arcane
Posts: 2272
Joined: Sat Oct 04, 2003 10:55 pm
Boat Name: Jenny
Boat Type: 1966 Pearson Triton
Location: Rowley, MA
Contact:

Post by bcooke »

Varnish is 100% compatible with 'teak' oil.
-Britton
Work is overrated.

Most everything you read on the Internet is wrong.

The Website
The Blog
Post Reply